


Are you ready for the next lesson? Once again, we will be needing Adobe Photoshop in doing this. Why don't you grab the finished image on our last lesson or click here.
Now that you have the image, let us continue.
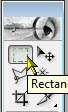
 1. On the toolbox, choose the Rectangular Marguee Tool (refer to the left image).
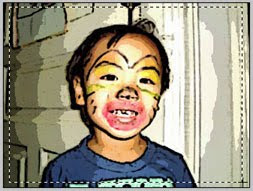
2. Make a square selection like the illustration on the left.
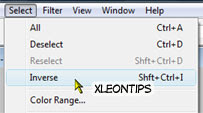 3. On the menu, go to Select and choose Inverse. Look at the illustration on the right.
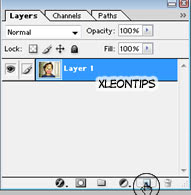 4. Locate the Layers mini-window inside Adobe Photoshop. It looks like the image on the left. Now, make a new layer by clicking the create new layer icon.
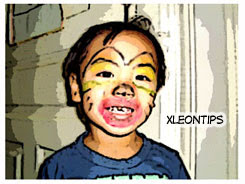 5. Paint the inversed selection box with white color. Now, it should look like the one on the right side.
6. Right-click on the newly created layer and choose Blending Options.
7. Select Outer Glow, change the color to black, and Blend Mode to Normal. Most likely your image will look the right below the Layer Style image.

 8. Now, we are not yet done. Create a new layer like in step 4. Choose that layer and paint it with white and it SHOULD be under the frame.
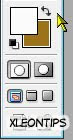 9. In your toolbox, make your primaty color white and secondary brownish orange or as you like - best is brownish-orange. Refer to image on the left.
10. Your image should look just like a plane box - same as the right box.
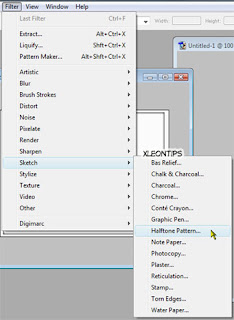
11. Now on the menu Go to Filter and choose sketch and Halftone Pattern, choose dots. It should look like the pattern on the right below.

12. Select the new.layer and Choose Overlay. It will look this. Add some text in your comic image, look for anime fonts or comic book fonts - Check out here.

13. Lastly, after putting a text. Select the layer of the frame and choose "Rectangle Tool". Draw a rectangle using the "rectangle tool" and cover the text area. Here is your finish product.
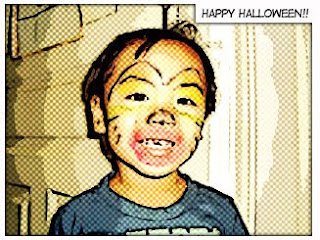
Wow, it's a pain just to layout this lesson. Forgive me guys, let me fix this issue later. And that would be our lesson for today.
Now that you have the image, let us continue.

 1. On the toolbox, choose the Rectangular Marguee Tool (refer to the left image).
2. Make a square selection like the illustration on the left.
 3. On the menu, go to Select and choose Inverse. Look at the illustration on the right.
 4. Locate the Layers mini-window inside Adobe Photoshop. It looks like the image on the left. Now, make a new layer by clicking the create new layer icon.
 5. Paint the inversed selection box with white color. Now, it should look like the one on the right side.
7. Select Outer Glow, change the color to black, and Blend Mode to Normal. Most likely your image will look the right below the Layer Style image.


 9. In your toolbox, make your primaty color white and secondary brownish orange or as you like - best is brownish-orange. Refer to image on the left.
10. Your image should look just like a plane box - same as the right box.
11. Now on the menu Go to Filter and choose sketch and Halftone Pattern, choose dots. It should look like the pattern on the right below.


12. Select the new.layer and Choose Overlay. It will look this. Add some text in your comic image, look for anime fonts or comic book fonts - Check out here.

13. Lastly, after putting a text. Select the layer of the frame and choose "Rectangle Tool". Draw a rectangle using the "rectangle tool" and cover the text area. Here is your finish product.

Wow, it's a pain just to layout this lesson. Forgive me guys, let me fix this issue later. And that would be our lesson for today.


