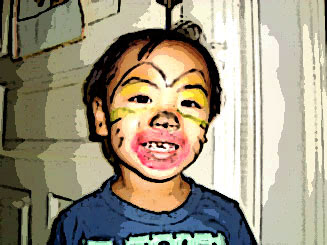
 Hello! I am back. I thought I was really going to catch a cold there, I'm feeling better now. I have promised before from my past article that I'll be posting an article which includes a new technique to create a cartoon effect.
As you can see, my boy Ize is back with a new lesson for everyone. Here I'll be teaching you another way to achieve cartoon effect like the finished picture on the left side.
You'll probably hate me for this. This is a shorter version of the first Cartoon to Photo lesson that I did. So here it goes:
1. First, right-click on this picture and save to clipboard or save it on a file and then use it on your adobe photoshop.
2. Use Poster Edges. You can use the default value.
3. Adjust the Brightness and Contrast till you are satisfied with the outcome.
 That's how simple it is. The first one is kinda clean cartoon effect while this one is not so neat version or grunge cartoon effect.
Hope you enjoyed our lesson.
Using this same image (the one on the left), we will continue our lesson about Comic Style Picture on our next lesson.
Thank you very much and wish you enjoy your stay.


No comments:
Post a Comment